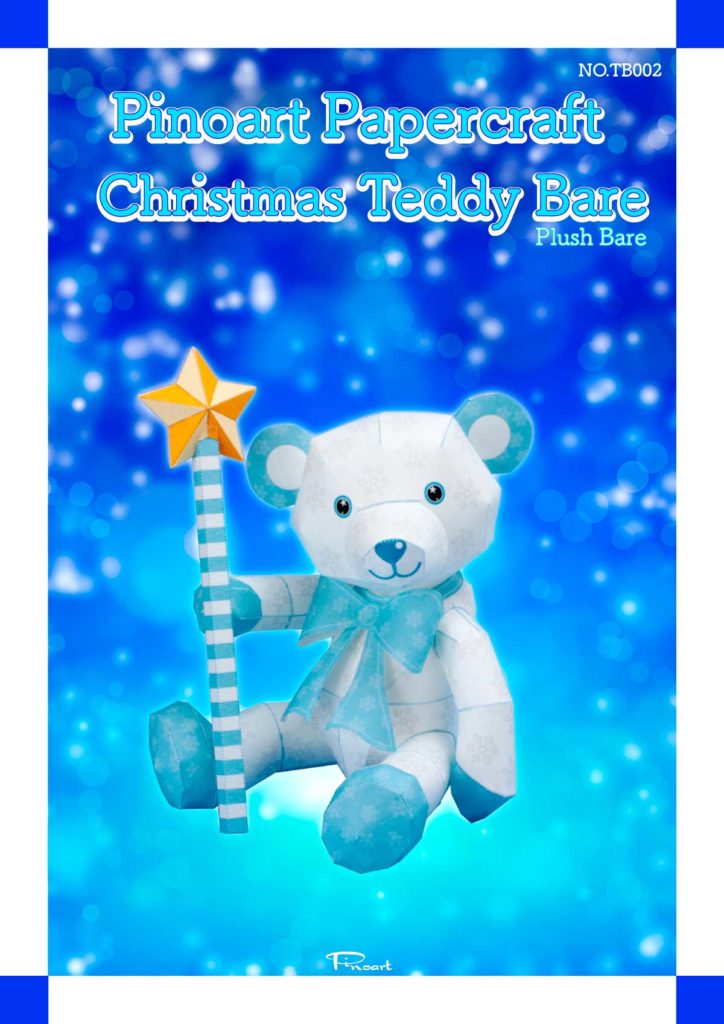
Pinoart Papercraft “Christmas” novelty goods. Paper craft of teddy bear (plush bear).
「クリスマス」のノベルティグッズ。テディベア(クマのぬいぐるみ)のペーパークラフト。
はじめに
このペーパークラフトは、無料で楽しむことができます。
☆ペーパークラフト展開図の印刷。
「1ページ目表示」「2ページ目表示」「3ページ目表示」のリンクボタンをクリックするとペーパークラフト展開図が表示されますので、一枚ずつ印刷してください。
☆使用する紙質により画質が左右されます。適切な印刷設定をお選びください。
☆ペーパークラフト説明書
説明書は、ブログページをご覧ください。各部品ごとに写真で説明されていて、分かりやすくなっています。
楽しみながら、ゆっくり丁寧に作っていきましょう。「クリスマス」のノベルティグッズ。テディベア(クマのぬいぐるみ)のペーパークラフトを完成させてください。
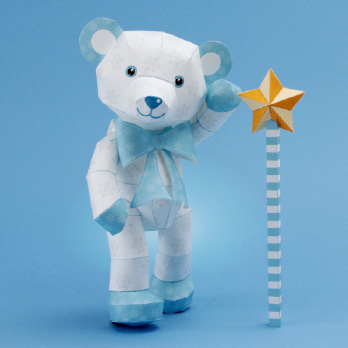
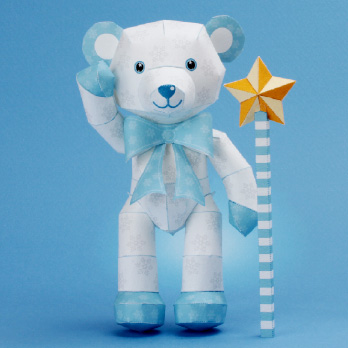
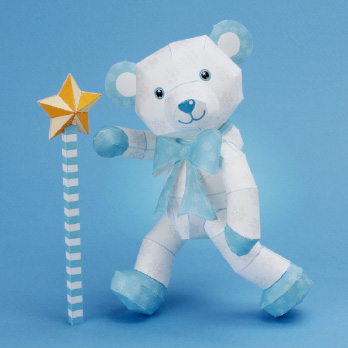
また、手足が動くのでいろんなポーズをさせて楽しんでください。
A4対応インクジェットプリンターが必要です。
今回は、キヤノンインクジェットプリンターを使用しました。(機種名;GM5630)
工作用の用紙
今回は、マーメイドスノーホワイト 菊判斤量95.3Kgを使用しました。それをA4にカットしています。
※現在発売されている物は、菊判斤量93.5Kgが近い物になります。
※市販で販売されているインクジェット用クラフト用紙でも制作できます。
印刷用ペーパークラフト展開図
このペーパークラフトは、無料で印刷して作ることができます。ただし、著作権を放棄する物ではありません。利用規約(こちら)に同意する必要があります。利用規約に同意できましたら、リンクボタンをクリックしてください。ペーパークラフト展開図が表示されますので、印刷してください。
今回の印刷設定です。キヤノンGM5630の印刷設定です。
◆詳細設定・・用紙サイズ;A4 倍率;100%
◆システムダイヤログを使用して印刷
プリンタの機能・・用紙サイズ;A4 用紙の種類;普通紙 普通紙の高品位プリント
各プリンターで設定が異なりますので、それぞれの印刷品位と用紙に合わせて印刷してください。
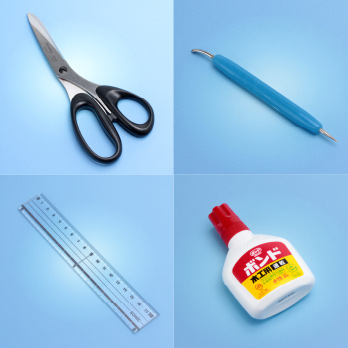
用意する道具
はさみ・鉄筆・定規・木工用ボンド
各マークの意味
山折り線
谷折り線
のりしろ
三角のりしろ
-スポンサーリンク-
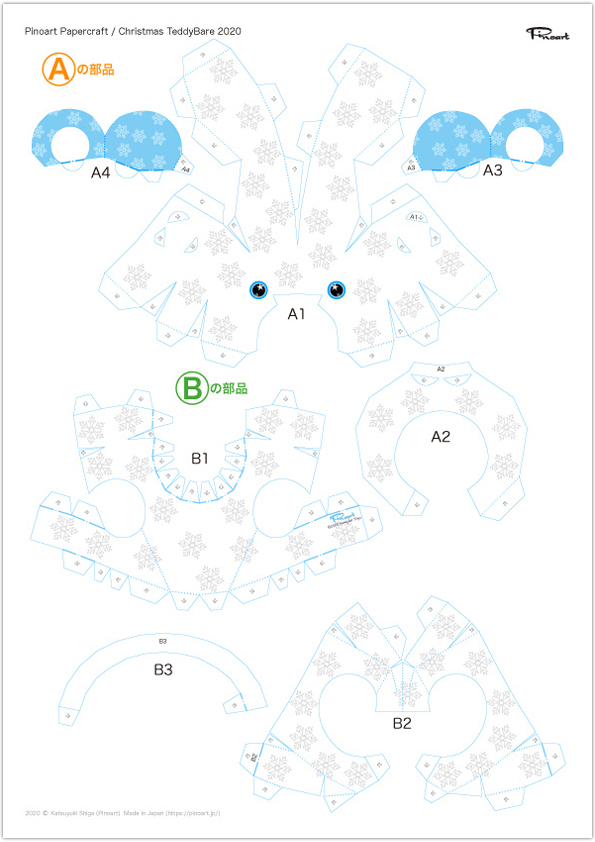
Aの部品の頭を作ります。
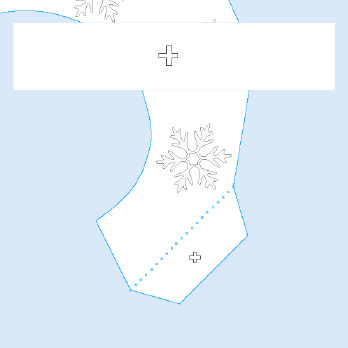
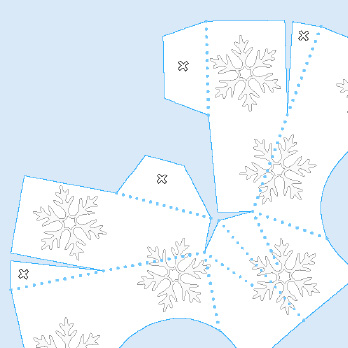
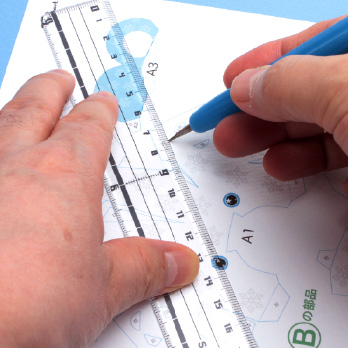
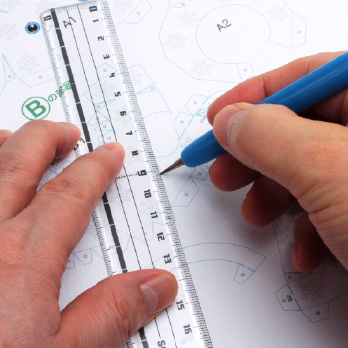
①すべての部品に折りスジを付けます。 定規と鉄筆を使って、山折り線と谷折り線に折りスジを付けておきましょう。
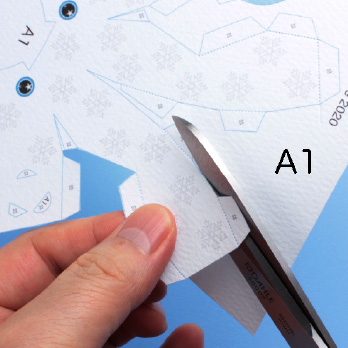
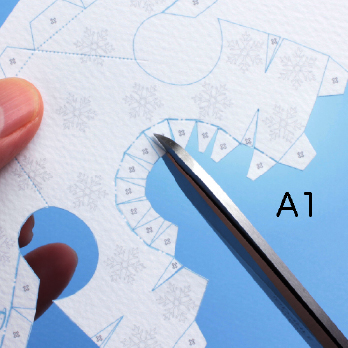
②部品を切り抜きます。りんかく線の上を丁寧に切り抜きます。のりしろの白い部分を切り抜かないようにしてください。三角のりしろは、頂点まで切り込みを入れてください。制作時間に限りがある場合は、その都度切り抜いてください。
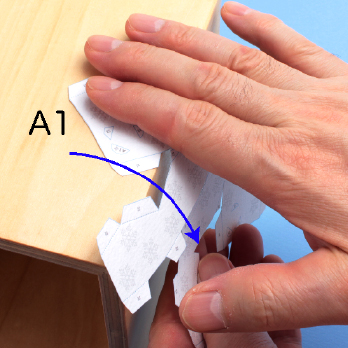
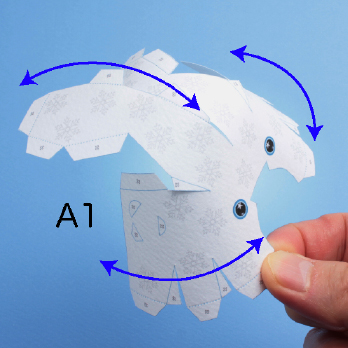
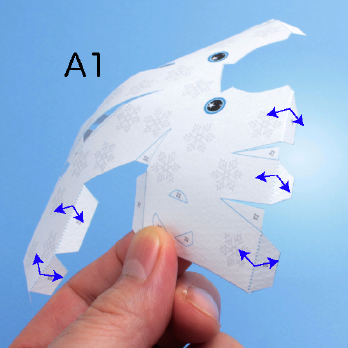
③部品を組み立てやすくするために丸みを付けます。テーブルの角などを利用して矢印の方向に丸めてください。各部品は、青の矢印の方向に丸みを付けてください。
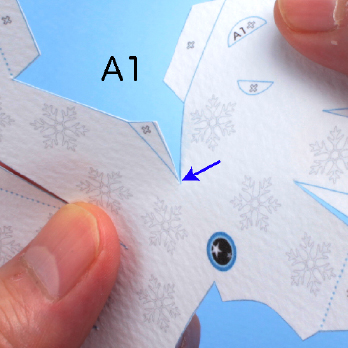
④A1の折り線に折りぐせを付けます。以下各部品の折り線の説明は省いています。
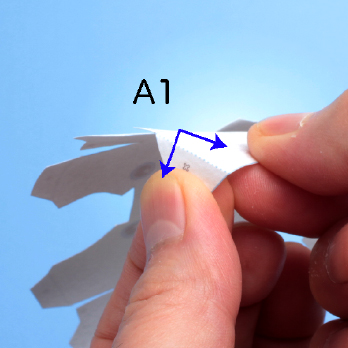
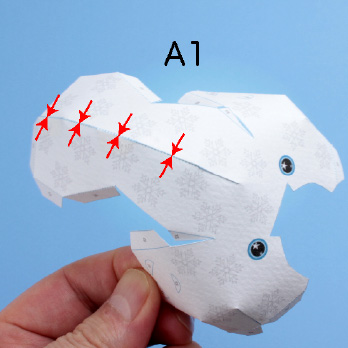
⑤A1の三角のりしろを貼り合わせます。表面がふくらむように貼り合わせてください。各部品にある三角のりしろの説明は省いています。


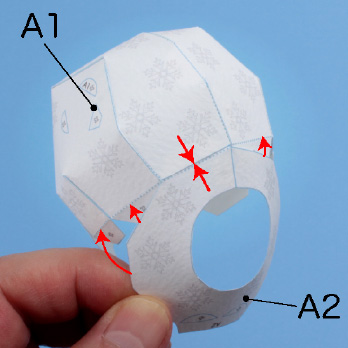
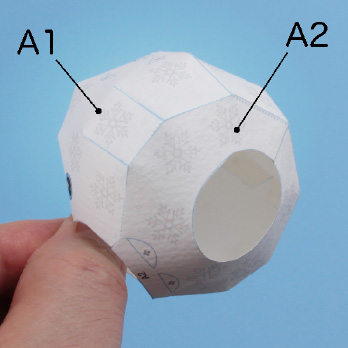
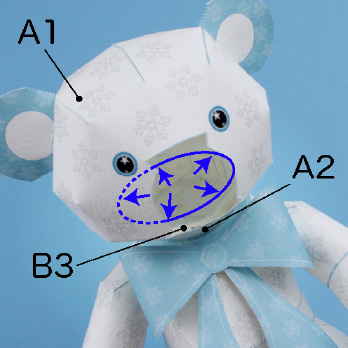
⑥A2に丸みを付けて組み立てます。
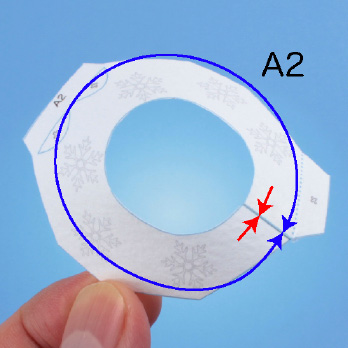
⑦A1とA2を組み合わせます。
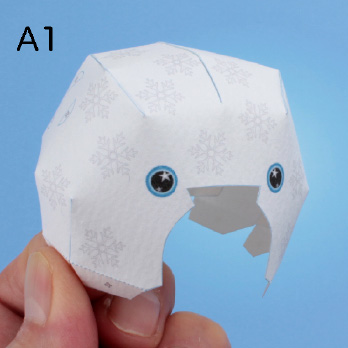
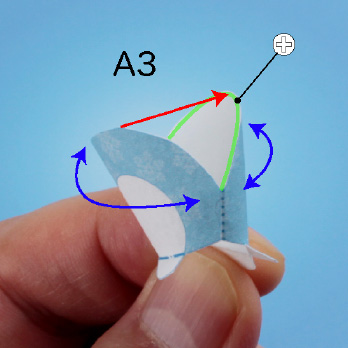
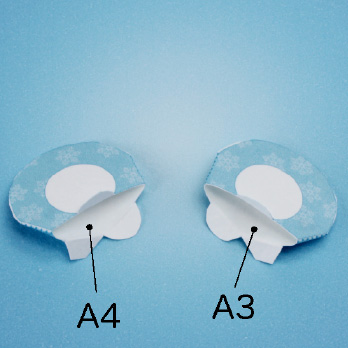
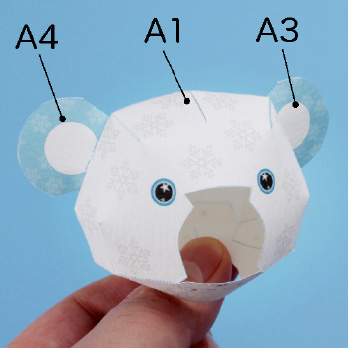
⑧A3とA4に丸みを付けて組み立てます。A3の写真で示した部分にのりを付けて貼り合わせます。同じようにA4を貼り合わせます。
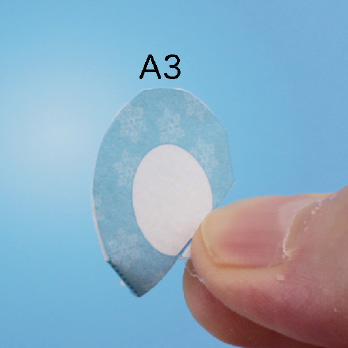
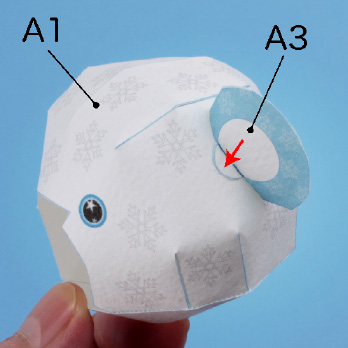
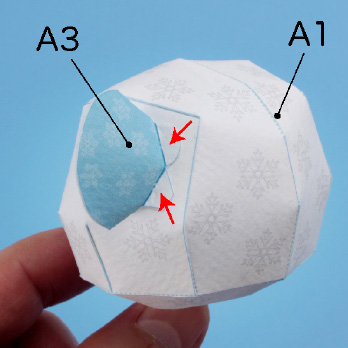
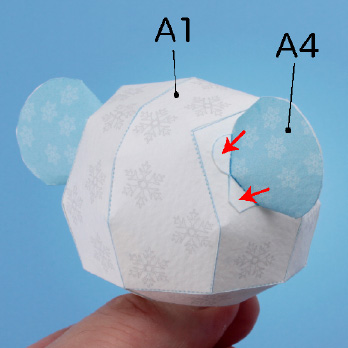
⑨頭のA1にA3とA4を貼り合わせます。
-スポンサーリンク-
Bの部品の胴体を作ります。
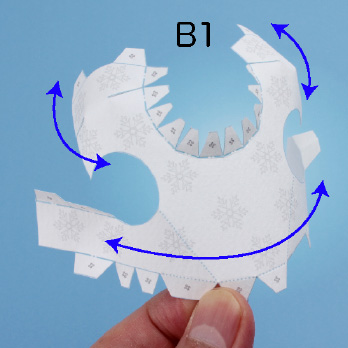
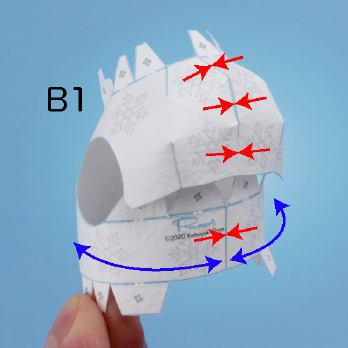
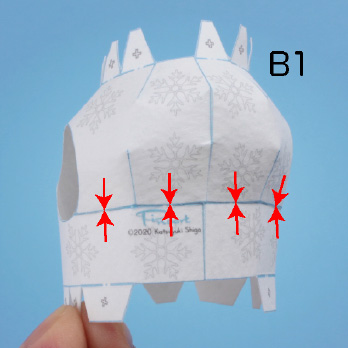
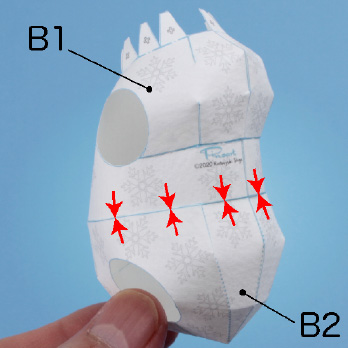
①B1に丸みを付けて、三角のりしろを貼り合わせます。次に残りののりしろを貼り合わせて組み立てます。
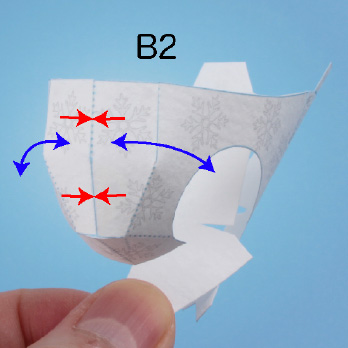
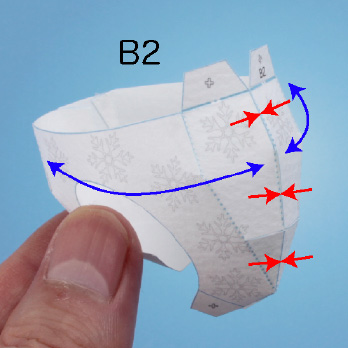
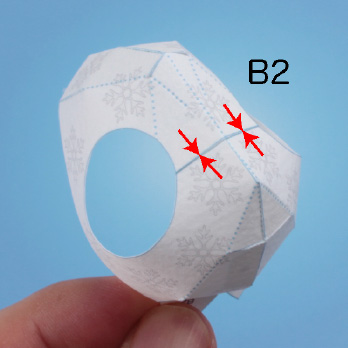
②B2に丸みを付けて三角のりしろを貼り合わせます。次に残りののりしろを貼り合わせて組み立てます。
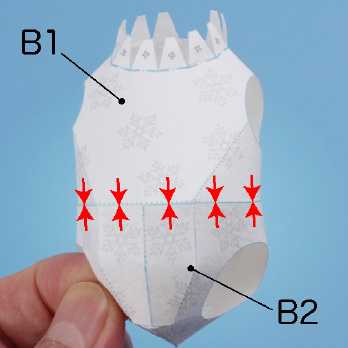
③B1とB2を組み合わせます。
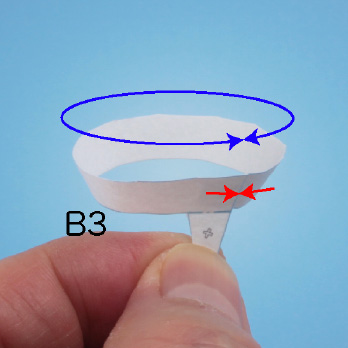
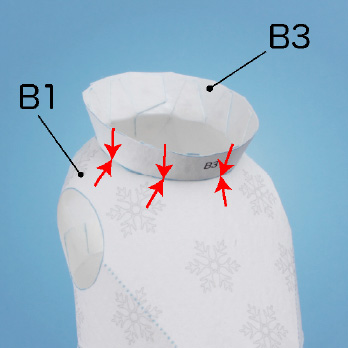
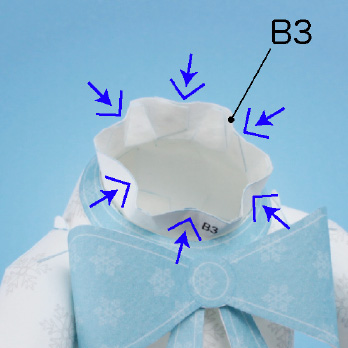
④B3を丸めて組み立て、B1とB3を組み合わせます。胴体になります。
-スポンサーリンク-
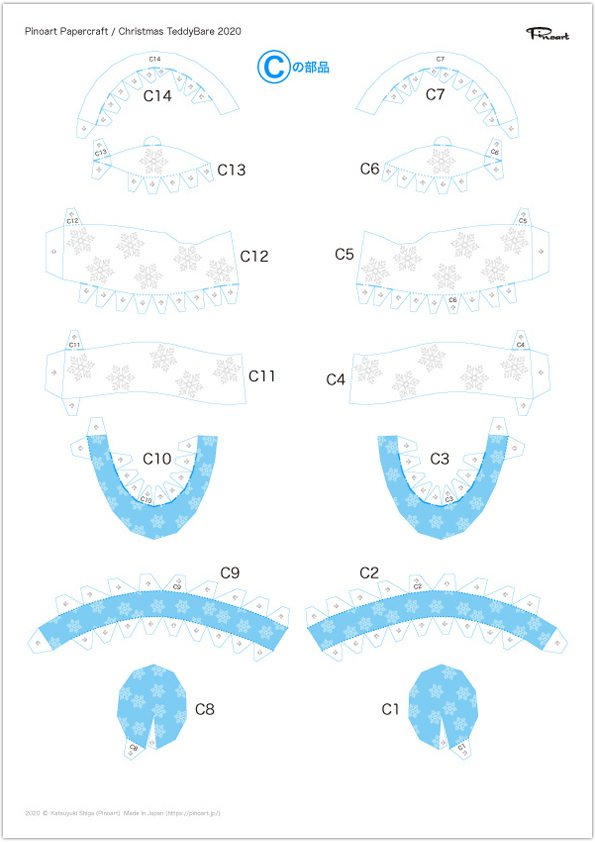
Cの部品の足を作ります。
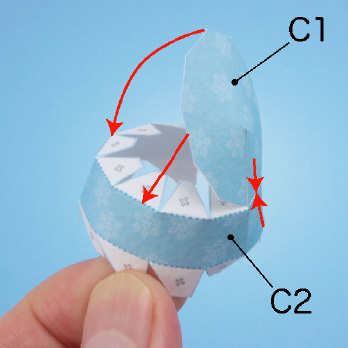
①C1からC7に丸みを付けて組み立てます。
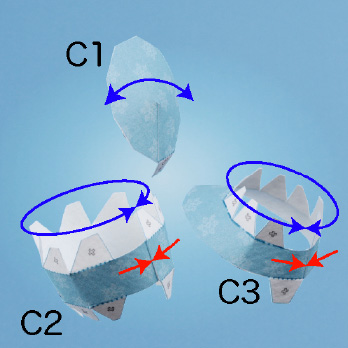
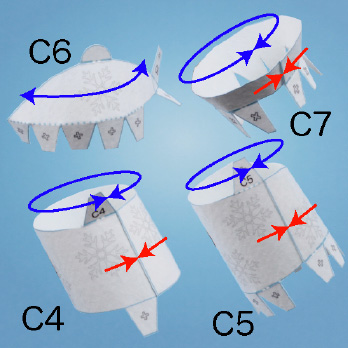
②C1とC2を組み合わせます。次にC2とC3を組み合わせます。
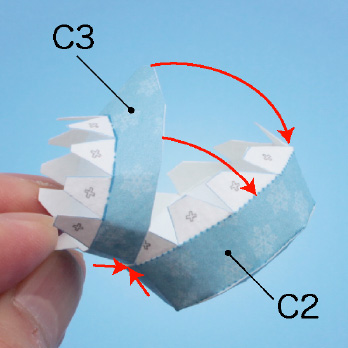
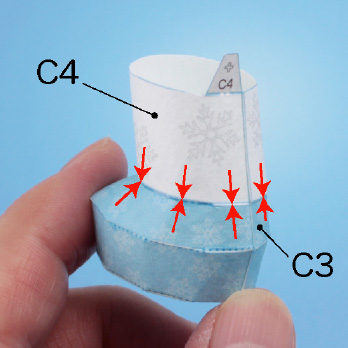
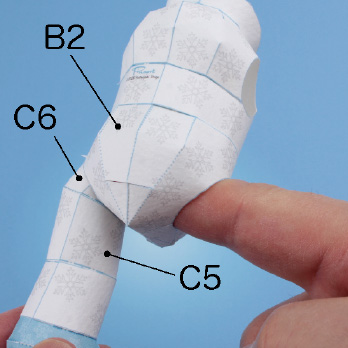
③C3とC4を組み合わせます。次にC4とC5を組み合わせます。
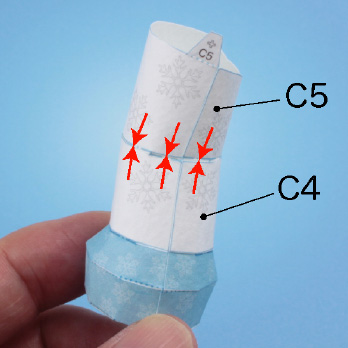
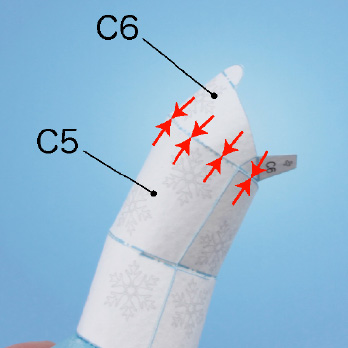
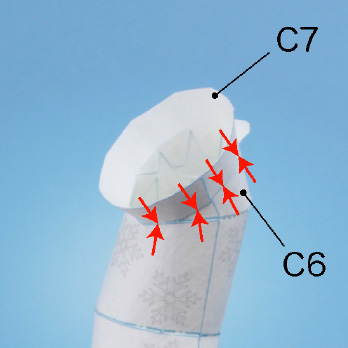
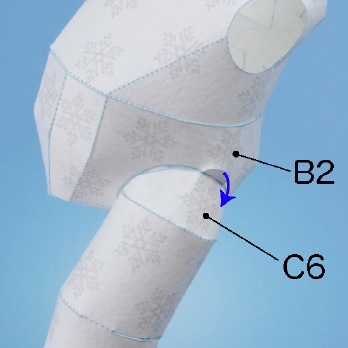
④C5とC6を組み合わせます。次にC6とC7を組み合わせます。左足になります。
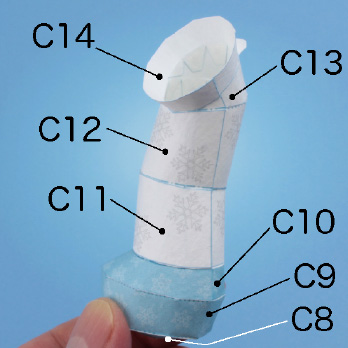
⑤左足と同じようにC8からC14を組み合わせます。右足になります。

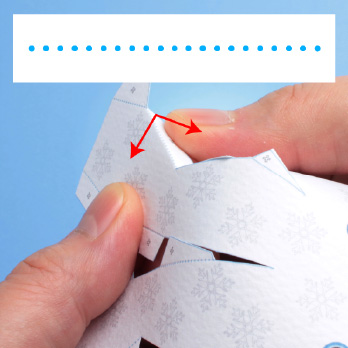
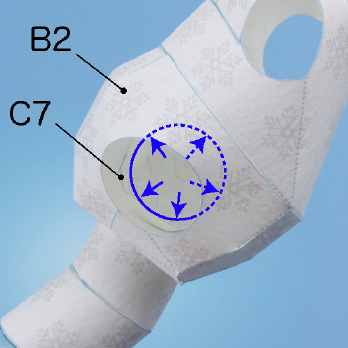
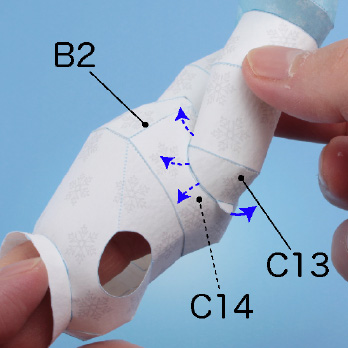
⑥左足のC7の部品を写真のように折り縮めて、テディベアから見てB2の左下の穴に差し込みます。C6の突起は外に出します。のりは付けずにスムーズに回転するようにしてください。
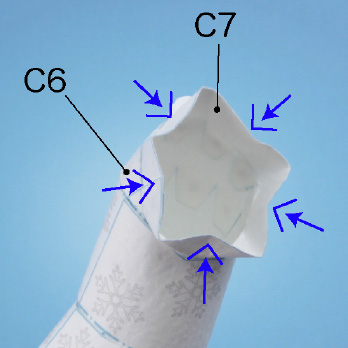

⑦差し込んだら、C7を元の形に戻します。
⑧左足と同じようにして、テディベアから見てB2の右下の穴に右足のC14を差し込みます。C13の突起は外に出します。
-スポンサーリンク-
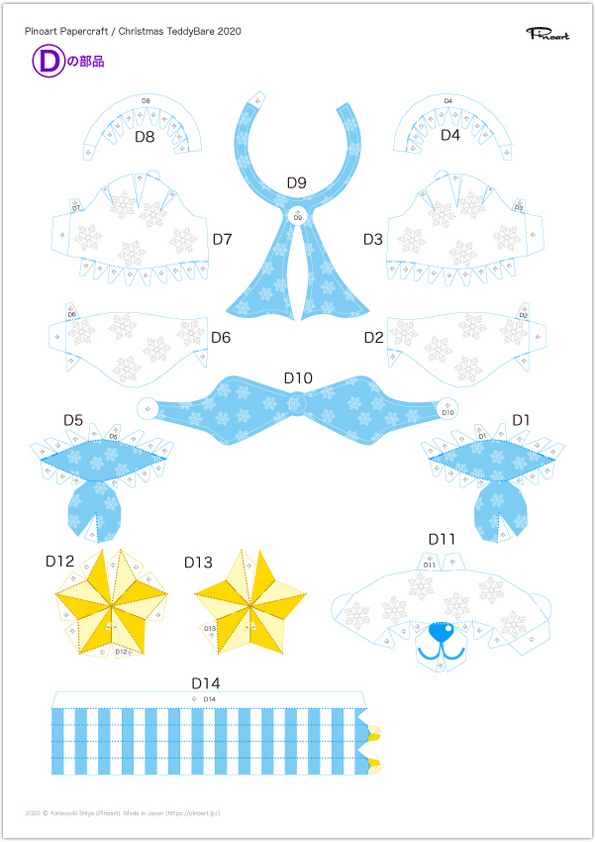
Dの部品の腕と顔と青いリボンを作ります。
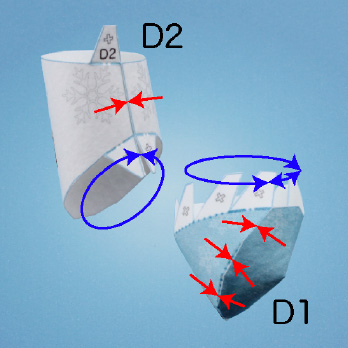
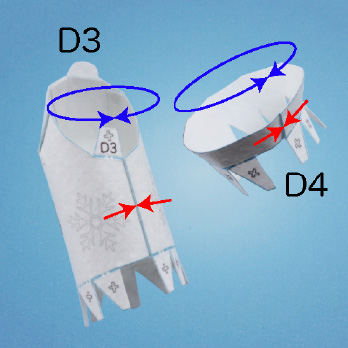
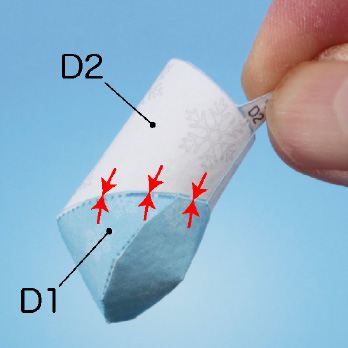
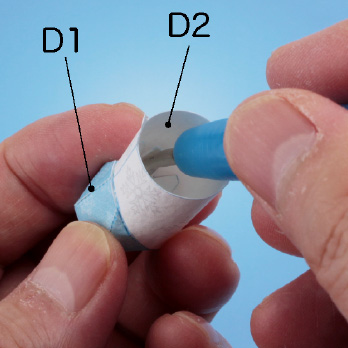
①D1からD4に丸みを付けて組み立てます。
②左腕のD1からD4を順番に組み合わせます。指が届かない場合は、細い棒などを使ってのりしろを押さえてください。
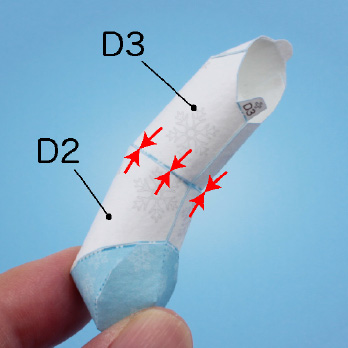
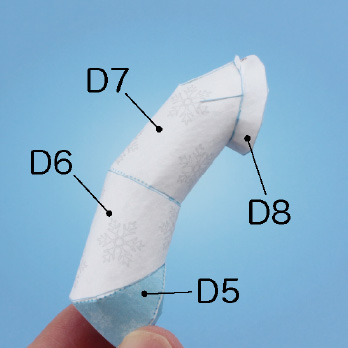
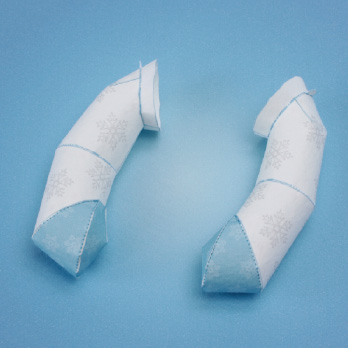
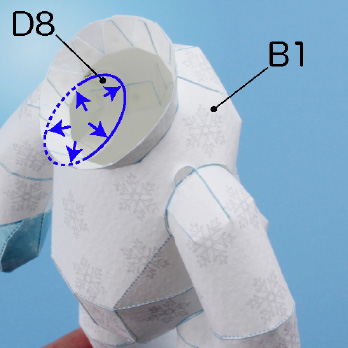
③左腕と同じようにして、右腕のD5からD8を順番に組み合わせます。
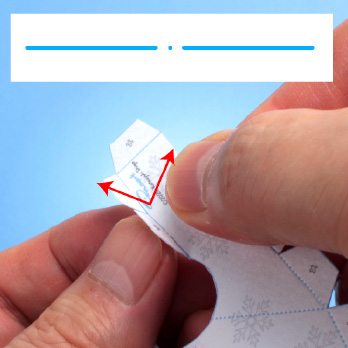
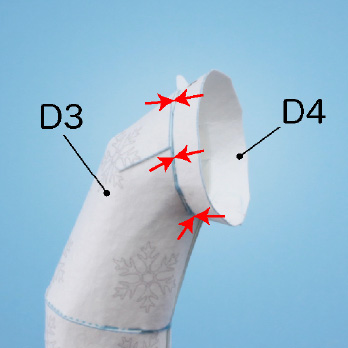
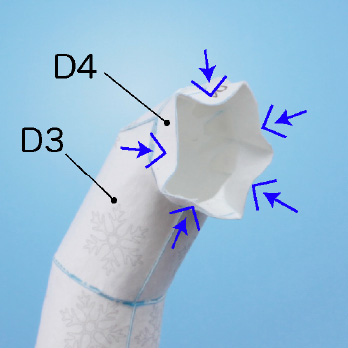
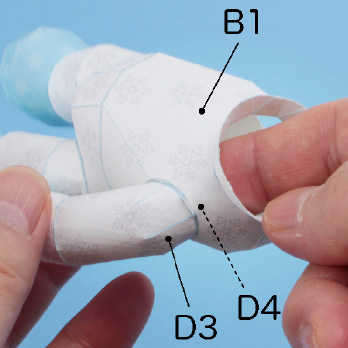
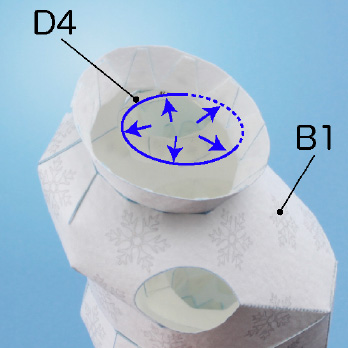
④左腕のD4の部品を写真のように折り縮めて、テディベアから見てB1の左上の穴に差し込みます。D3の突起は外に出します。のりは付けずにスムーズに回転するようにしてください。
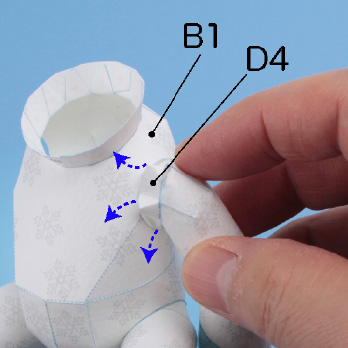
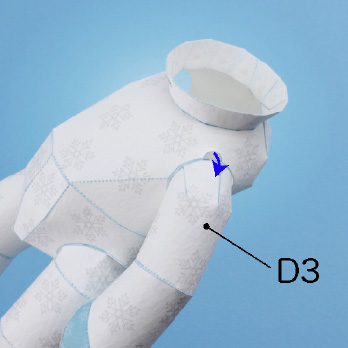
⑤差し込んだら、D4を元の形に戻します。
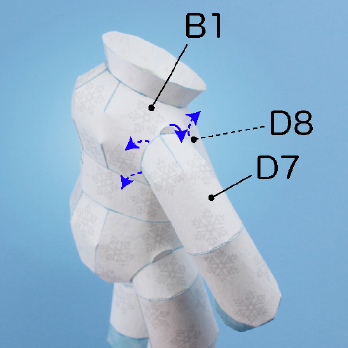
⑥左腕と同じようにして、テディベアから見てB1の右上の穴に右腕のD8を差し込みます。
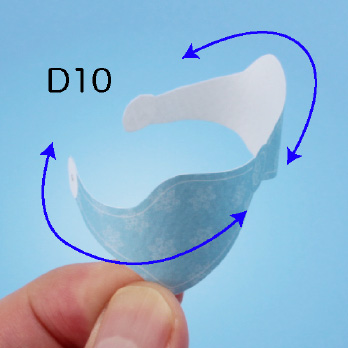
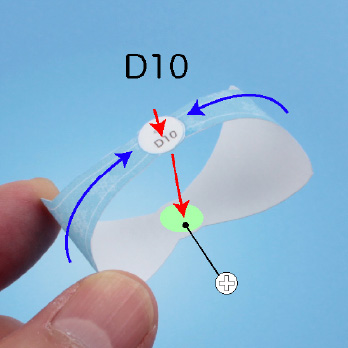
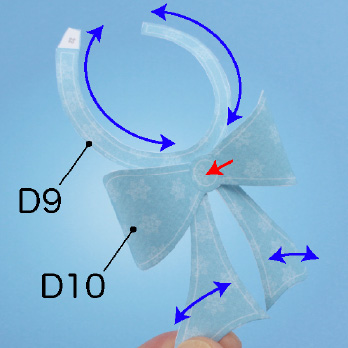
⑦D10を組み立て、D9に貼り合わせます。
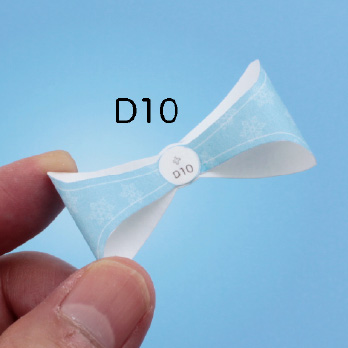
⑧できたリボンを首に巻きます。
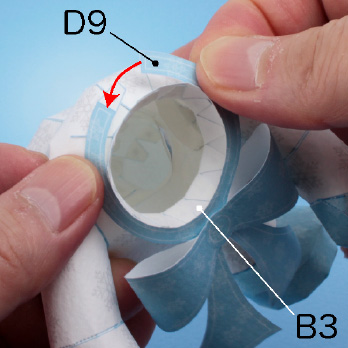

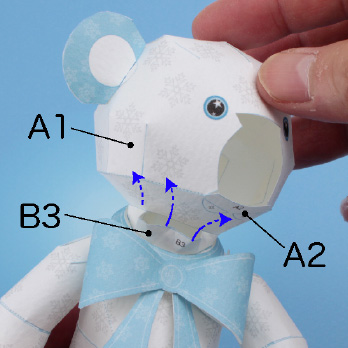
⑨胴体のB3を頭のA2に差し込みます。B3の部品を写真のように折り縮めます。次にA2に差し込みます。差し込んだらB3を元の形に戻します。のりは付けないでください。スムーズに回転するようにしてください。
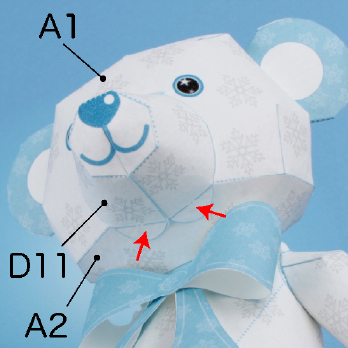
⑩D11に丸みを付けてを組み立てます。
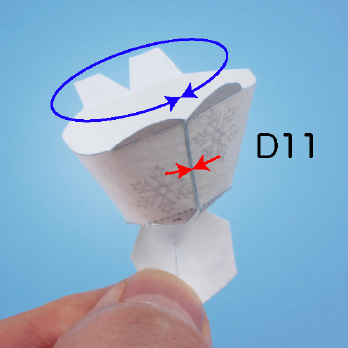
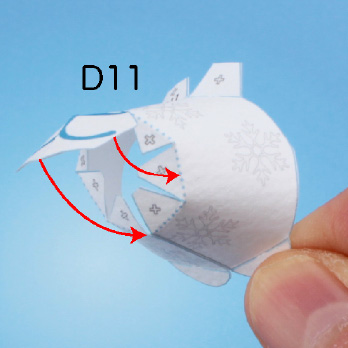
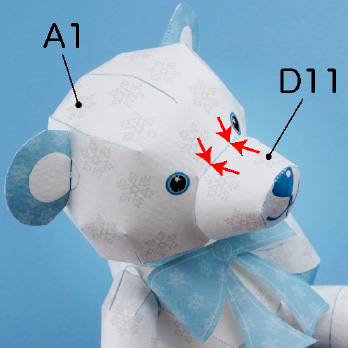
⑪顔のA1とA2に鼻先のD11を貼り合わせます。
⑫D12とA13の折り線を丁寧に折り、組み合わせます。
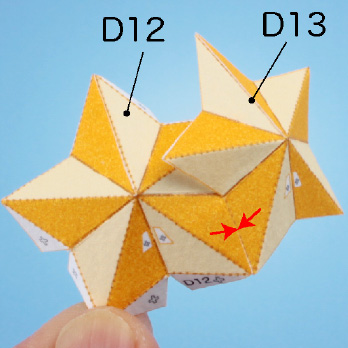

⑬D14を組み立て、星のD12とD13に組み合わせます。
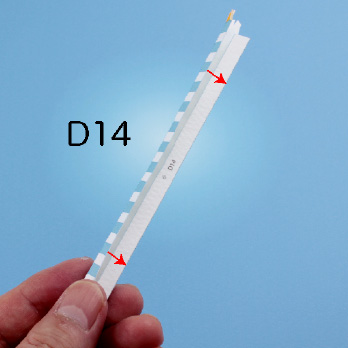
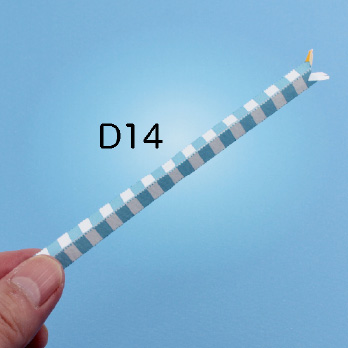
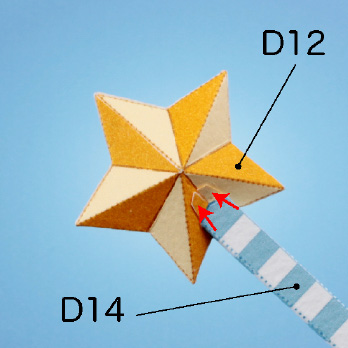
⑭星のスティックを添えて、できあがりです。手足が動くのでいろんなポーズを楽しみましょう。
最後まで作ってくれてありがとうございました。”メリークリスマス”