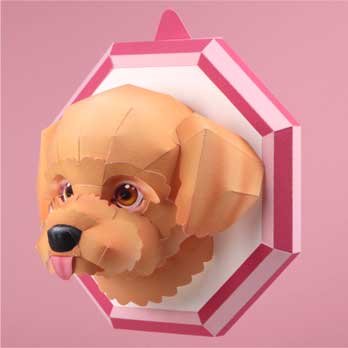
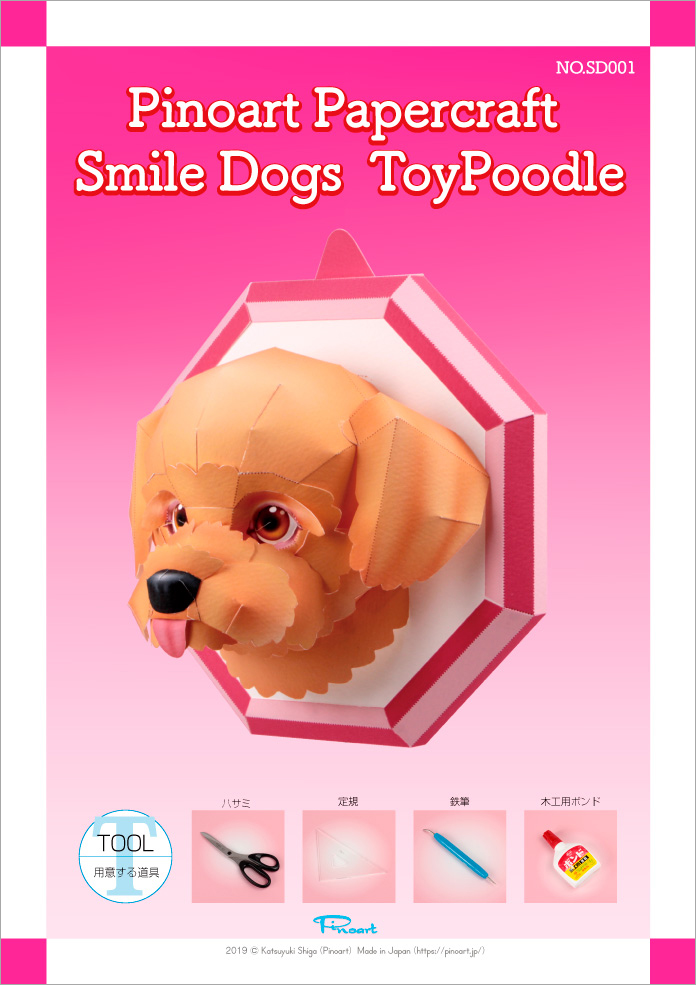
Pinoart Papercraft Smile Dog Toypoodle Apricot
スマイルドッグ トイプードル アプリコット
はじめに
このペーパークラフトは、利用規約に同意することにより無料で楽しんでいただけます。
☆ペーパークラフト展開図の印刷。
「1ページ目表示」「2ページ目表示」「3ページ目表示」のリンクボタンをクリックするとペーパークラフト展開図が表示されます。一枚ずつ印刷してください。
☆使用する用紙の質により画質が左右されます。適切な印刷設定をお選びください。
☆ペーパークラフト説明書
説明書は、ブログページをご覧ください。各パーツごとに写真で説明されていて、分かりやすくなっています。なれていない方は一度に作ろうとせず、ABCDEのブロックごとに作っていくと良いでしょう。
楽しみながら、ゆっくり丁寧に作っていきましょう。スマイルドッグを完成させてください。
A4対応インクジェットプリンターが必要です。
今回は、キヤノンインクジェットプリンターを使用しました。(機種名;GM5630)
工作用の用紙
今回は、PCM竹尾 DEEP PV マーメイドスノーホワイト A4を使用しました。
利用規約
無料で印刷して作ることができますが、利用規約(こちら)に同意する必要があります。利用規約に同意できましたら、リンクボタンをクリックしてください。ペーパークラフト展開図が表示されますので、印刷してください。
印刷設定
今回の印刷設定です。キヤノンGM5630の印刷設定です。
◆詳細設定・・用紙サイズ;A4 倍率;100%
◆システムダイヤログを使用して印刷
プリンタの機能・・用紙サイズ;A4 用紙の種類;マットフォトペーパー 品位;品位標準(品位優先)
各プリンターで設定が異なりますので、それぞれの印刷品位と用紙に合わせて印刷してください。
印刷用ペーパークラフト展開図PDF
YouTube
ペーパークラフトの制作手順をYouTubeにアップいたしました。どのように立体になるかを詳しく見ることができます。下記の写真説明と一緒に参考にしてください。
用意する道具
はさみ
木工用ボンド
鉄筆
定規

各マークの意味
山折り線

谷折り線
のりしろ
三角のりしろ
-スポンサーリンク-
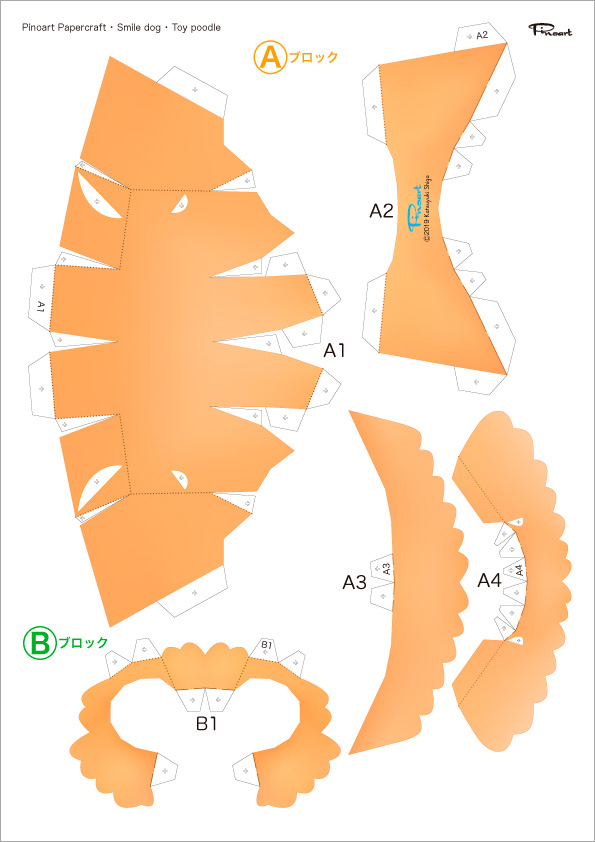
Aのブロックを作る
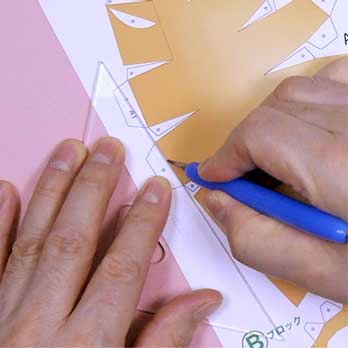
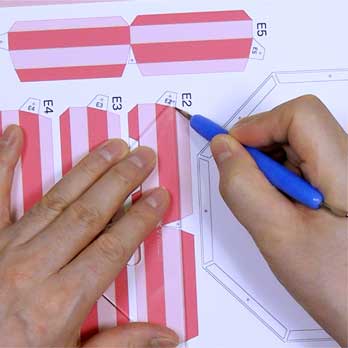
①鉄筆と定規をつかって、折り線に沿って折り筋を付けます。 すべてのパーツの山折り線と谷折り線に折り筋を付けておきましょう。
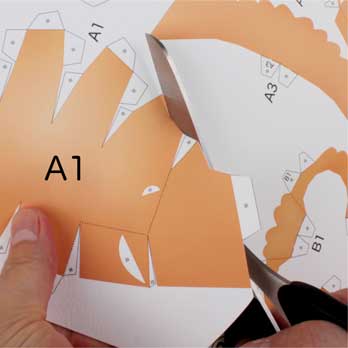
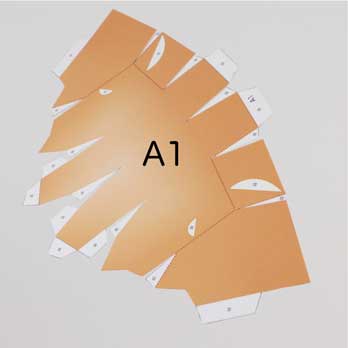
②Aブロックのパーツを切り抜きます。りんかく線に沿って切り抜いてください。バックの白が残ったり、のりしろを切り抜いたりしないようにしましょう。
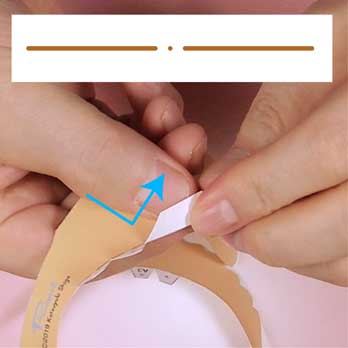
③三角のりしろを貼りやすくするために、テーブルなどの角を利用して、丸く加工します。できあがる形に丸く立体に加工してください。のり付けがしやすくなります。
④折り線に折りぐせをつけます。
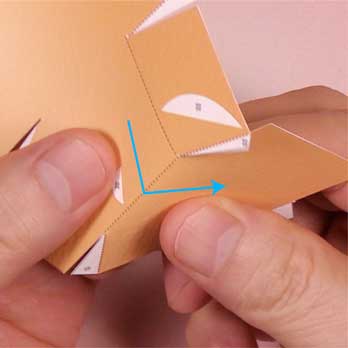
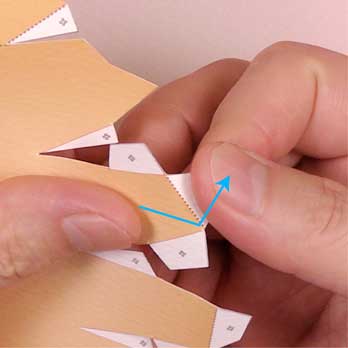
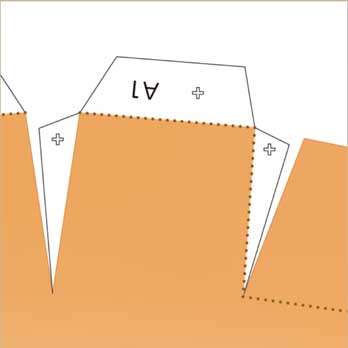
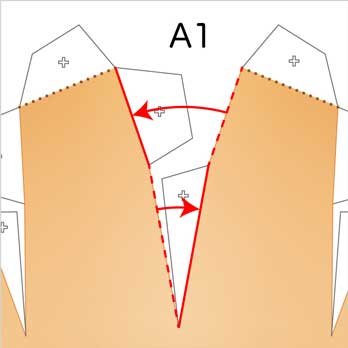
⑤パーツを立体にするために、三角ののりしろを貼り合わせます。1つのパーツを作るには、1~5までの工程があります。
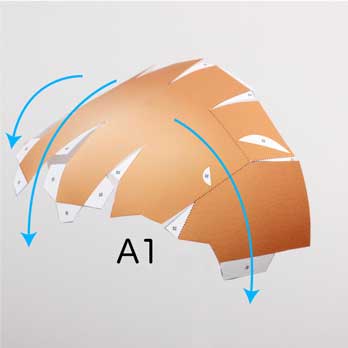
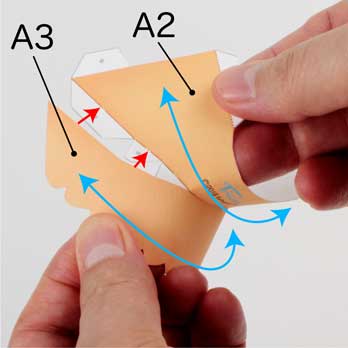
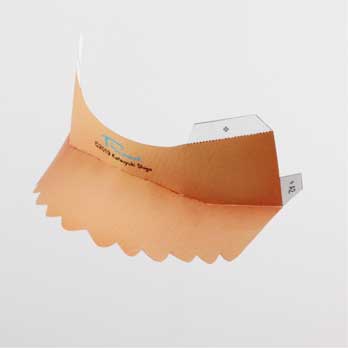
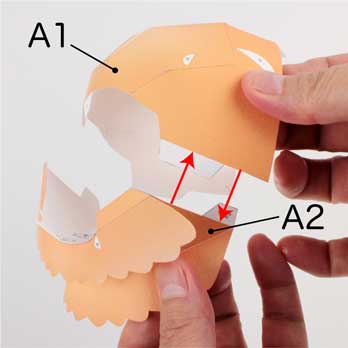
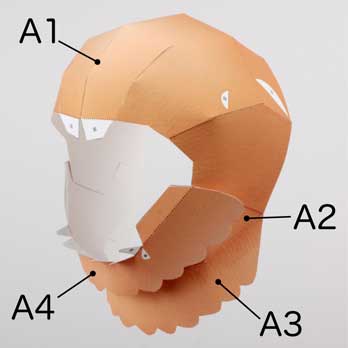
⑥A2とA3を組み合わせる。
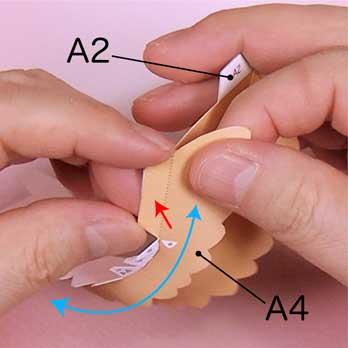
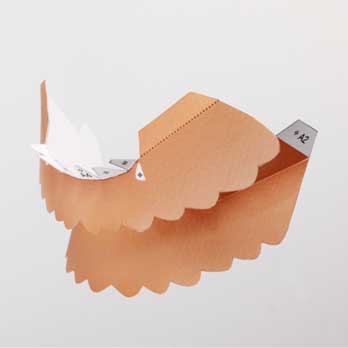
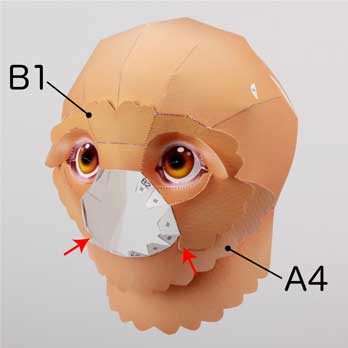
⑦A2とA4を組み合わせる。
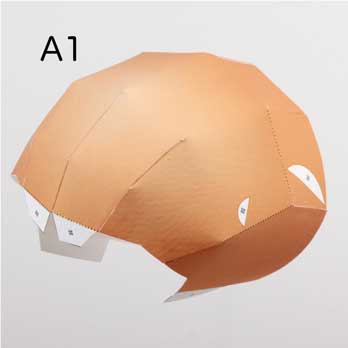
⑧A1とA2を組み合わせる。
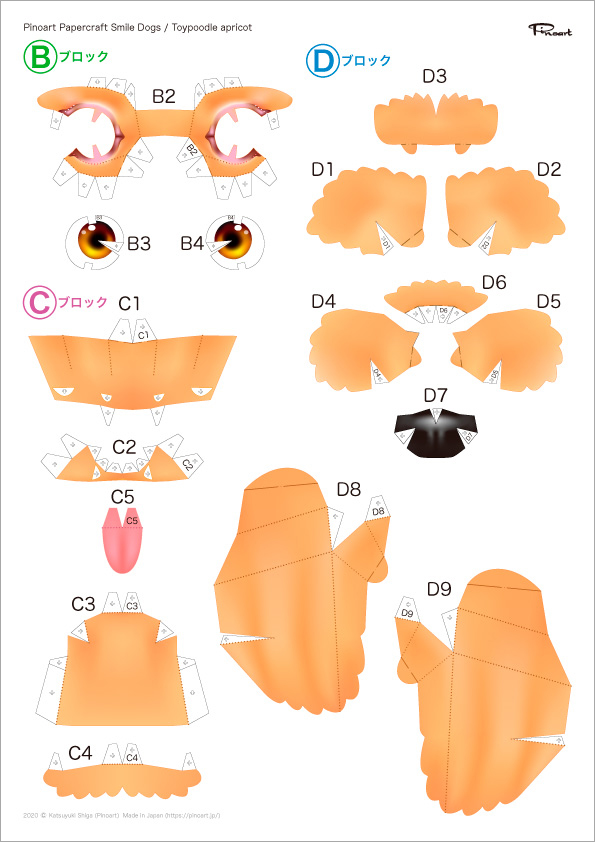
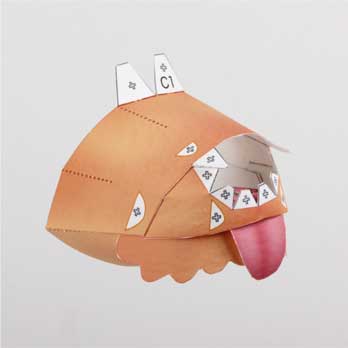
Bのブロックを作る
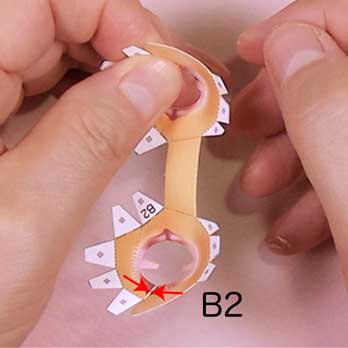
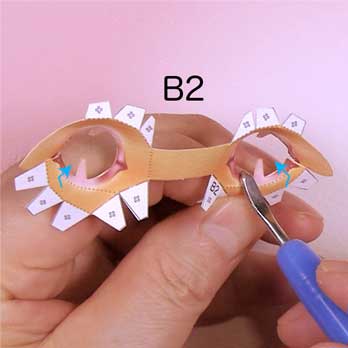
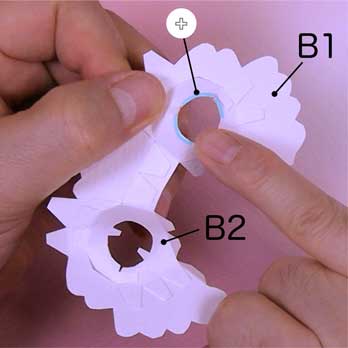
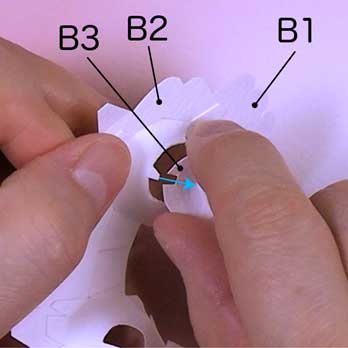
①B2を作る。2つの輪をつくります。イラスト面がへこむように作ってください。また目の縁の折り線を折っておきましょう。
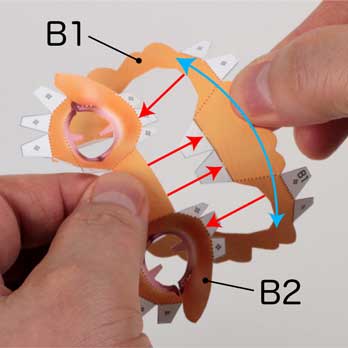
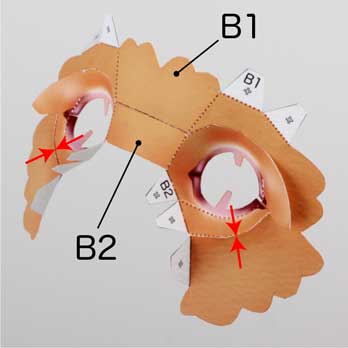
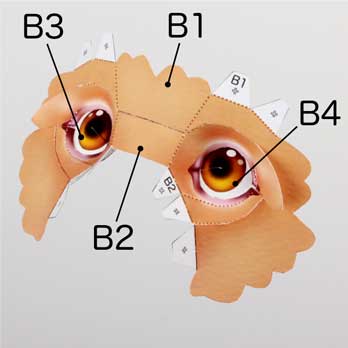
②B1とB2を組み合わせる。
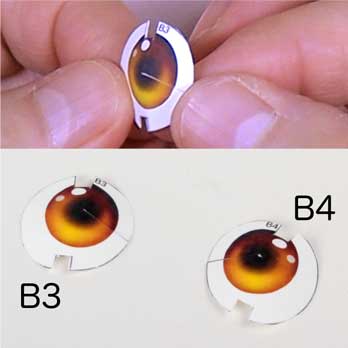
③B3とB4を作り、B2に貼り合わせる。目をのり付けするときは、目の裏側の縁にのりを付けておきましょう。少しより目で上目づかいになります。上下を間違えないでください。
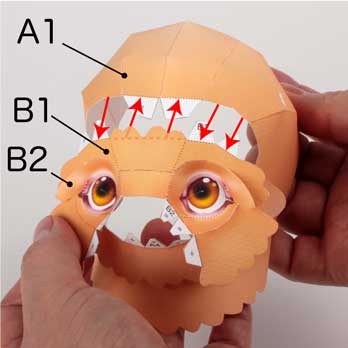
④AのブロックとBのブロックを組み合わせる。
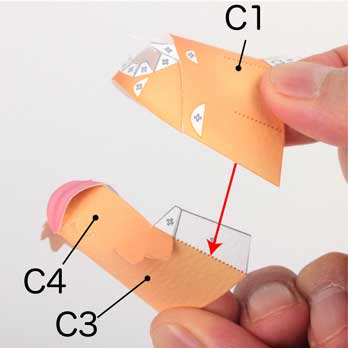
Cのブロックを作る
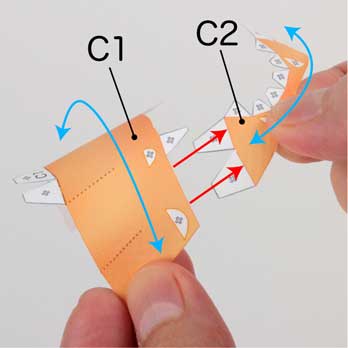
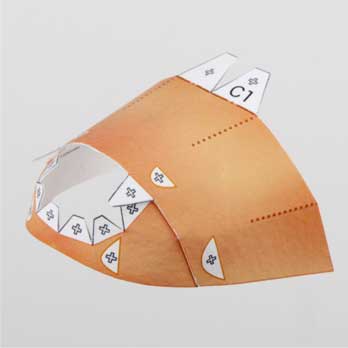
①C1とC2を組み合わせる。
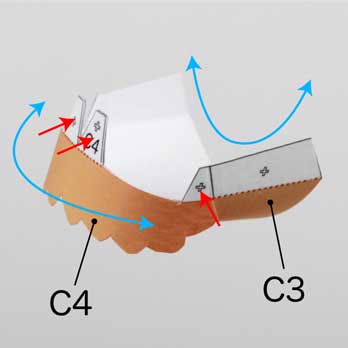
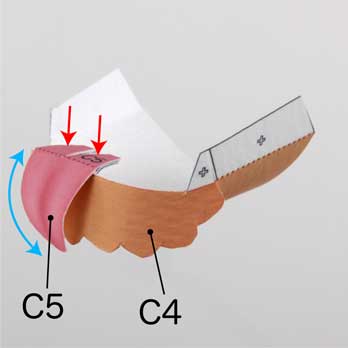
②C3とC4を貼り合わせ、C4とC5を貼り合わせる。
③C1とC3を組み合わせる。
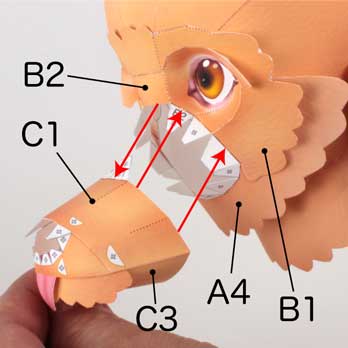
④Aのブロック、BのブロックにCのブロックを組み合わせる。
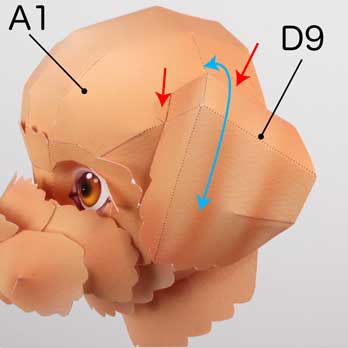
Dのブロックを作る
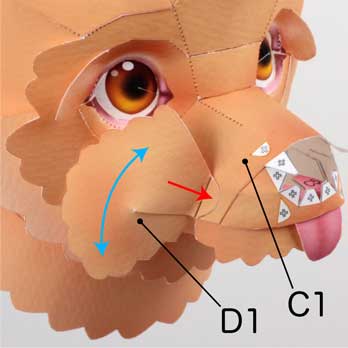
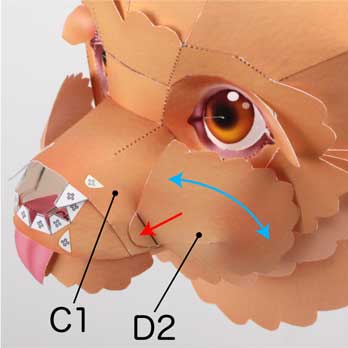
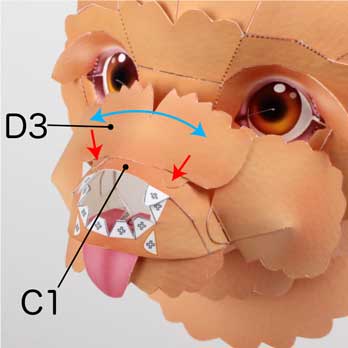
①D1からD6をC1とC2に順番に貼り合わせる。
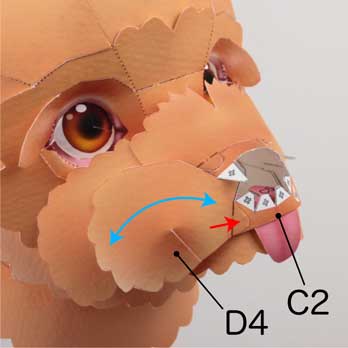
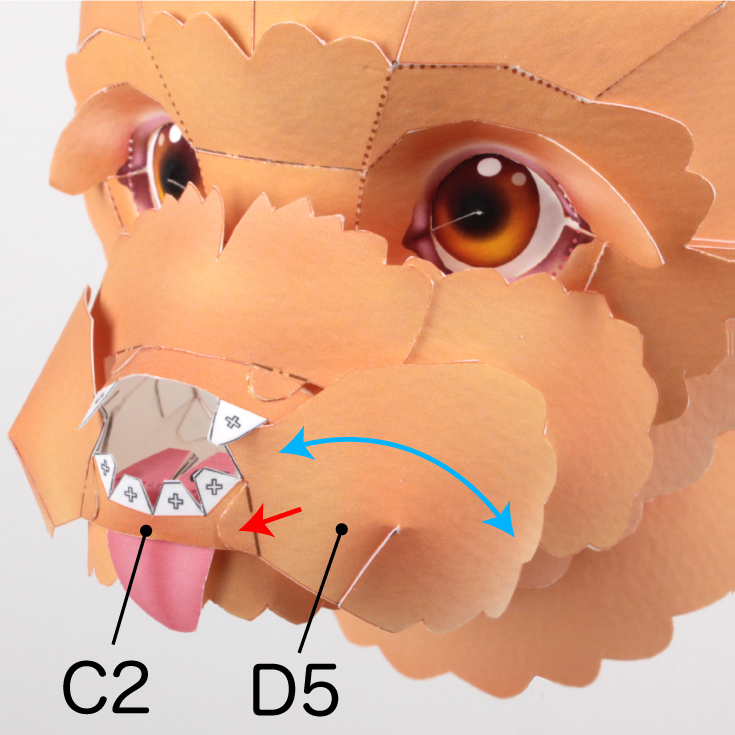

②C2とD6にD7をのり付けします。のりをD7の裏側につけてください。
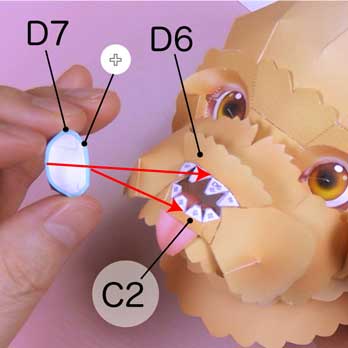
③D7をC2とD6に貼り合わせる。
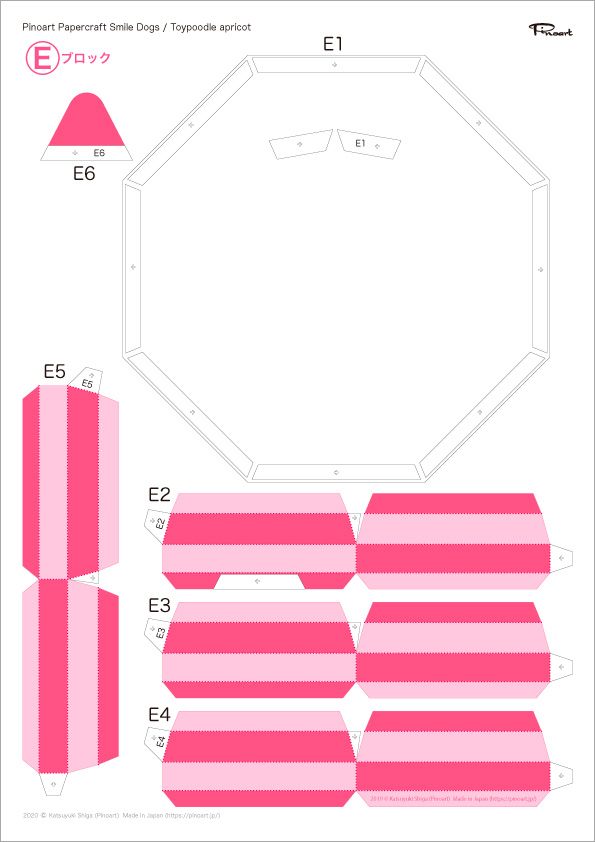
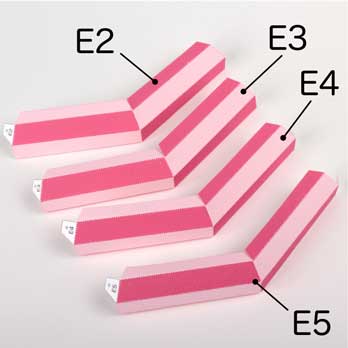
Eのブロックを作る
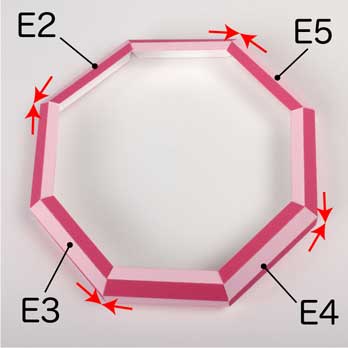
①E2からE5を作り、順番に組み合わせる。
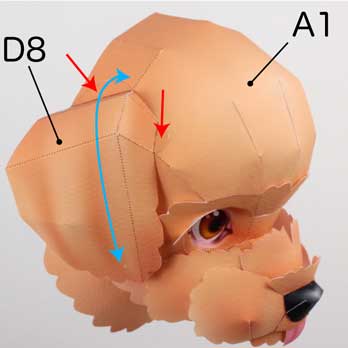
②E2からE5にE1を貼り合わせる。
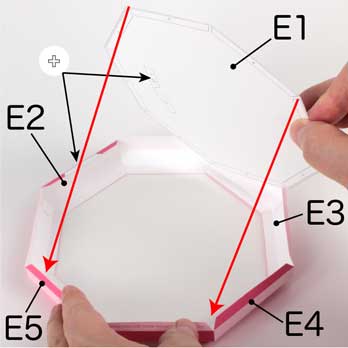
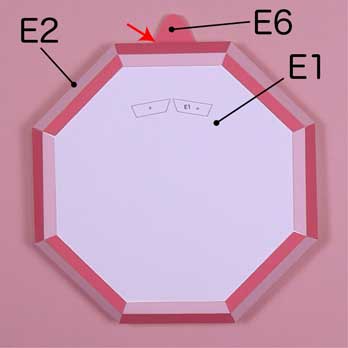
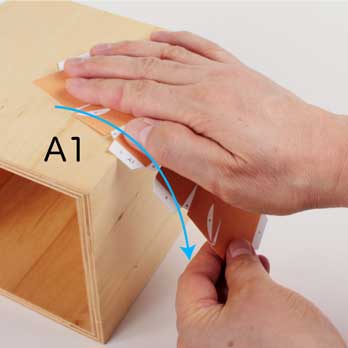
③A1をE1に貼り合わせる。できあがりです。お部屋に飾って楽しみましょう。